A Strength Training Workout You Can Do At Home – No Equipment Required
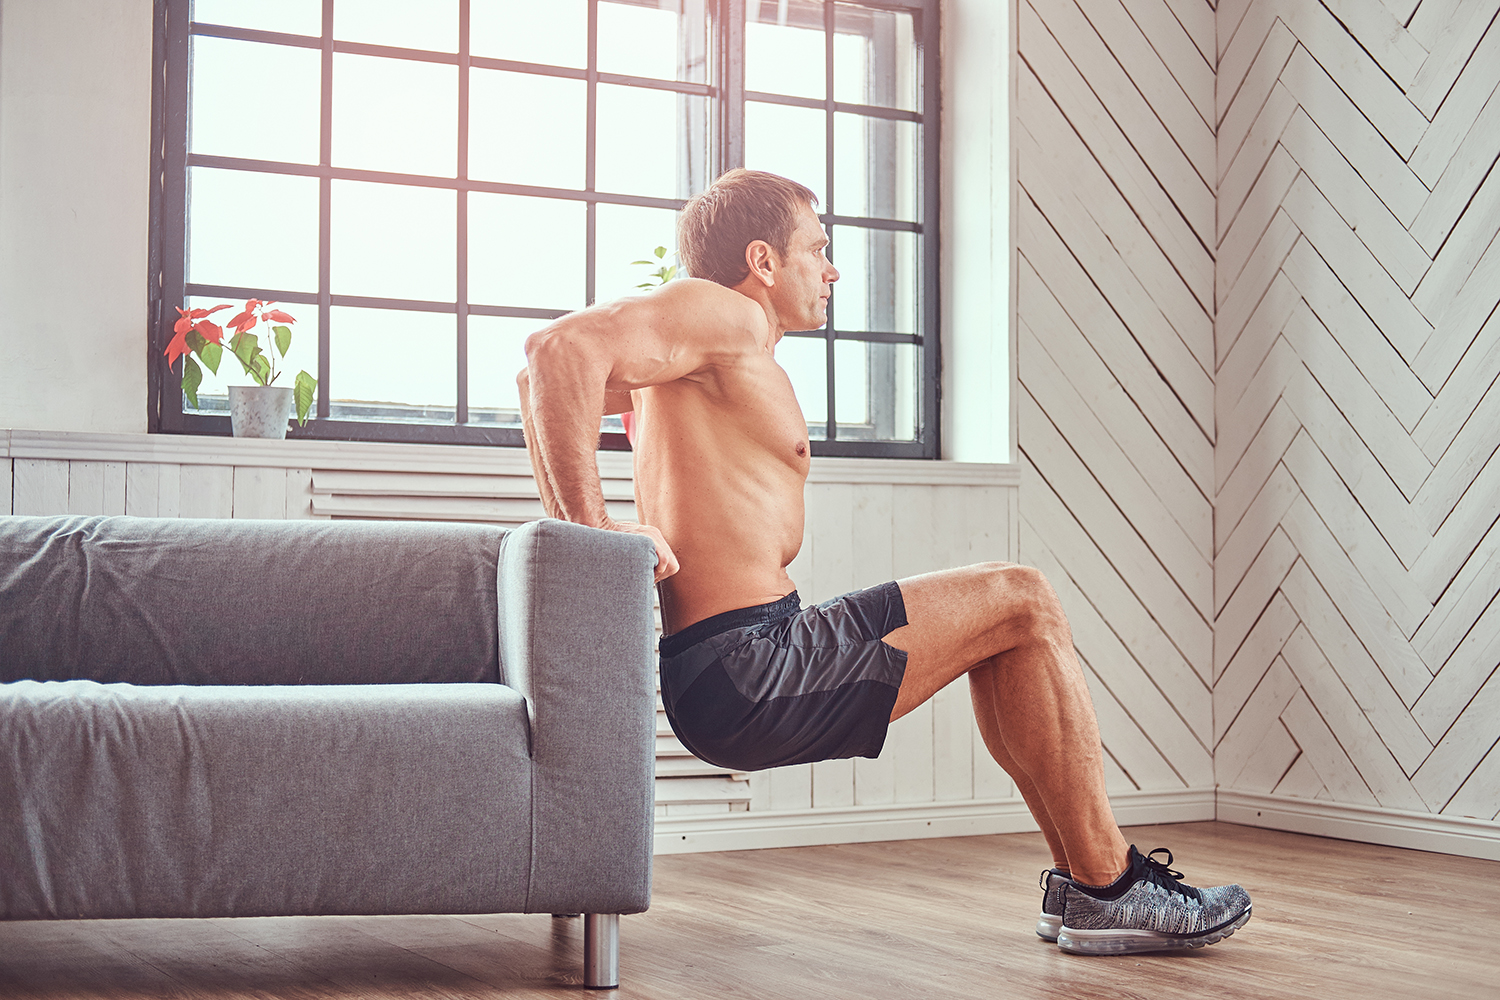
Even though I generally prefer to work out at a gym, there are occasionally times when a gym just isn’t available (like when I’m on vacation or my regular gym is temporarily closed).
No matter what the situation is, you can still get a great workout using just your bodyweight and some simple tools like a backpack and towels. And if you’re used to primarily exercising at a gym, you may be surprised by how challenging and effective this type of training can be!
Here is a full body workout routine you can do at home that doesn’t require any equipment at all.
Workout Guidelines
- Do this workout 3-4 times per week.
- Warm up by doing jumping jacks or jogging in place for 2-3 minutes or until you get a light sweat going.
- Complete this routine as a circuit, which means that you should do one set of each exercise in the list without resting in-between sets.
- After you’ve completed a full circuit, rest for 2-3 minutes, then do another circuit.
- Do 3 circuits in total to complete the workout.
Exercise 1 – Air Squats
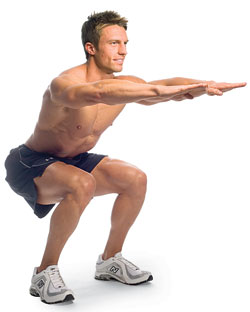 The squat is a compound, full body exercise that many consider to be the king of all leg exercises. Squats develop strength in your quadriceps, hamstrings, glutes, and your lower back.
Stand with your feet shoulder-width apart. Begin to squat down, as though you were going to sit into a chair. As you’re squatting down, raise both of your arms to shoulder level, with your palms down and facing the floor. Squat until your thighs are parallel with the floor, keeping your weight on your heels the whole time. Then use your legs to push yourself back up into the starting position.
To add more weight to this exercise, toss on a backpack with a few books or other items in it. A backpack is actually a great tool because you can use it to add resistance to a number of exercises.
Do 20 reps per set. If you can’t do 20, just do as many as you can.
Click here to see a video demonstration of air squats.
Exercise 2 – Push-Ups
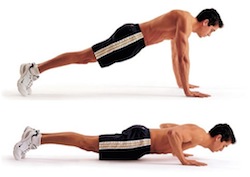 Push-ups are a great exercise for your chest, triceps, and shoulders.
Lie face-down on the floor with your hands just below your shoulders. Push yourself up off the ground. Your body should be perfectly straight throughout the entire movement, and you should keep your core tight.
If you’re not strong enough to do classic push-ups, then do your push-ups against a wall instead of the floor.
If you’re looking for something more challenging, then do push-ups with your feet up on a support, like a chair or bed. The added height increases the resistance by about 15-20%. You can also do push-ups with a backpack on, adding heavy items to the backpack to increase resistance.
Do 20 reps per set. If you can’t do 20, just do as many as you can.
Click here to see a video demonstration of push-ups.
Exercise 3 – Desk Inverted Rows
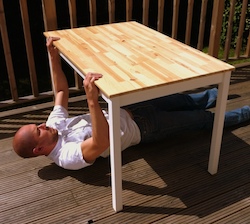 This is one exercise I bet you haven’t done before: inverted rows using a desk. That’s right, you’re going to use a desk to perform this exercise. Just make sure that the desk you’re using is strong enough to support you.
Lie on your back underneath the desk with your chest lined up with the edge of the desk. Reach up and grab the edge of the desk with both hands, about shoulder-width apart. Keep your body as straight as possible, just like with the push-up, and pull yourself up.
As an alternative to this exercise – which is also a little bit easier – you can do one arm rows with your luggage or a backpack, using your bed or another piece of furniture as the bench.
If you regularly don’t have access to a gym, you may want to invest in a pull-up bar for your doorway, which allows you to add pull-ups and chin-ups to your bodyweight training routine, two extremely effective exercises for building the muscles in the back.
Do 10-12 reps per set. If you can’t do 10-12 reps, just do as many as you can, or do the alternate one arm row exercise described above.
Click here to see a video demonstration of desk inverted rows.
Exercise 4 – Towel Bicep Curls
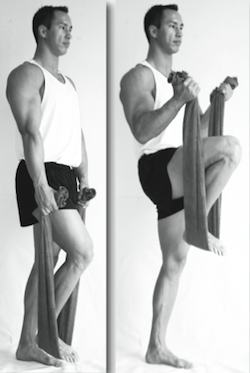 Now we’re going to use one of your bath towels to add resistance for bicep curls.
Stand with your back against the wall to help you balance. Hold both ends of the towel – one in each hand – so that it creates a U shape. Step onto the towel with one foot to add resistance, then do bicep curls by pulling up the “weight” with your arms. You can also do this exercise one hand at a time if you prefer.
It’s a little strange doing this exercise at first and learning how to regulate the resistance with your leg. Just give it a try and you’ll find that it becomes natural very quickly.
As an alternative to this exercise, use a backpack to do bicep curls, adding resistance to the exercise by putting more of your stuff into the backpack. See why a backpack is such a useful tool to have when traveling?
Do 10-12 reps per set.
Click here to see a video demonstration of towel bicep curls.
Note: The video above shows seated towel bicep curls. I prefer the standing version, but the video gives you a good idea of the general movement.
Exercise 5 – Chair Dips
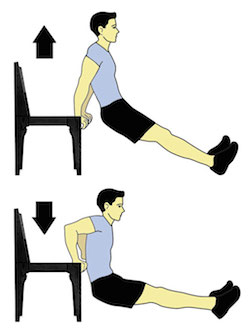 For this exercise, you need to locate a horizontal surface whose level is below your waist and above your knees. Think short tables, chairs, couch armrests, etc.
Let’s assume that you decided to use a short table. With your back to the table, reach behind you and grab the table with both hands, knuckles facing forwards (you will need to bend a little at the knees to do this). Then walk your legs out in front of you far enough so that you’re only using your arms to support your weight. To do one rep, lower your body down by bending only at the elbows and shoulders, until your upper arms are parallel to the floor. Push back up to the original position to complete the rep.
To make this exercise more difficult, instead of keeping your feet on the floor, support them using a chair, bed, or any other surface. You can also add weight to your lap to increase the resistance.
Do 10-12 reps per set. If you can’t do 10-12 reps, just do as many as you can.
Click here to see a video demonstration of chair dips.
Exercise 6 – Air Bicycle
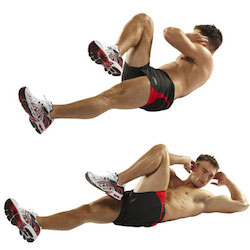 The air bicycle – also known as bicycle crunches – is one of my favorite ab exercises. In a study conducted by the Biomechanics Lab at San Diego State University, bicycle crunches were determined to be the most effective exercise for targeting the abdominal muscles, and the second most effective exercise for targeting the obliques.
To do the air bicycle, lie down with your back on the floor. Put one hand behind each ear so that your elbows stick out. Bring both of your knees up so that your thighs are perpendicular to the floor, and your lower legs are parallel to the floor. Now you want to do a cycling motion by pushing your right leg forward, bringing your left leg toward you, and twisting your body to bring your right elbow towards your left knee. Go back to the starting position and repeat the previous instruction, this time pushing your left leg forward and bringing your left elbow to your right knee.
For each set, do as many reps as you can do.
Click here to see a video demonstration of the air bicycle.
Conclusion
This workout is a great alternative to your usual routine when you don’t have access to a gym. The “no rest between sets” circuit aspect of this workout keeps your heart rate up and gives you a good cardiovascular workout, while the resistance training helps you develop strength and build muscle.